pr sample affiliate links
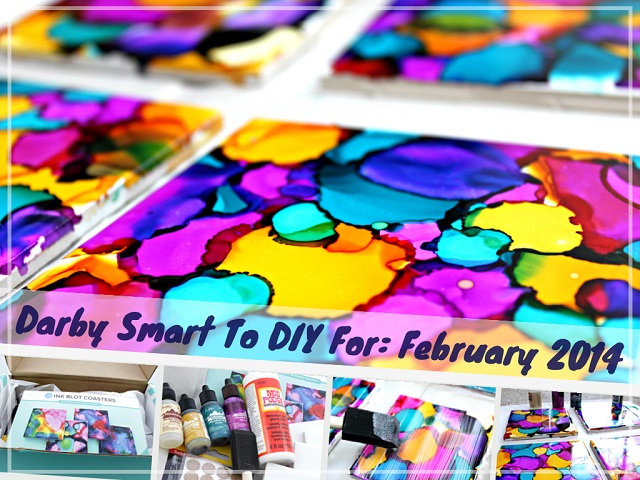
Here’s the promised review of the February 2014 Darby Smart To DIY For monthly box. I have to admit, I never ever completed a single DIY project before reviewing my first Darby Smart box back in August 2013. My first attempt was so successful, that I decided to keep doing little projects, and expanded into transforming my jewelry pieces, repainting things, and even built a spice rack from scratch! In the month of February, Darby Smart partnered up with Rachel from 52 Weeks Project to bring us this fun kit for making our own set of colorful coasters!
HOW IT WORKS
Every month for $19.00 + free S&H Darby Smart “To DIY For” Club members receive a kit with a mystery DIY project, curated by the featured designer or blogger. The kits come equipped with everything you might need for your project, so you won’t need any additional tools. Darby Smart also offers a variety of one-off projects at various price points, as well as gift boxes.
If you would like to use my referral link, click here to check out the list of projects. Thank you! 🙂
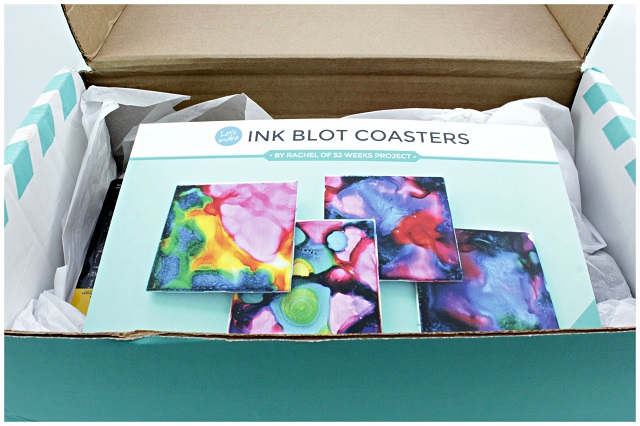 |
| Darby Smart To DIY For February 2014 Project – unboxing |
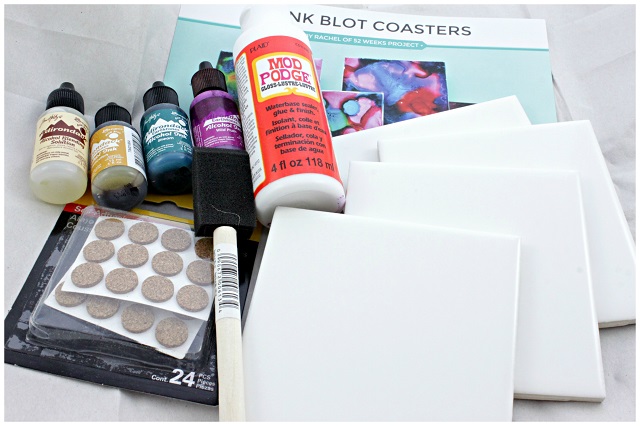 |
| Darby Smart To DIY For February 2014 Project – contents |
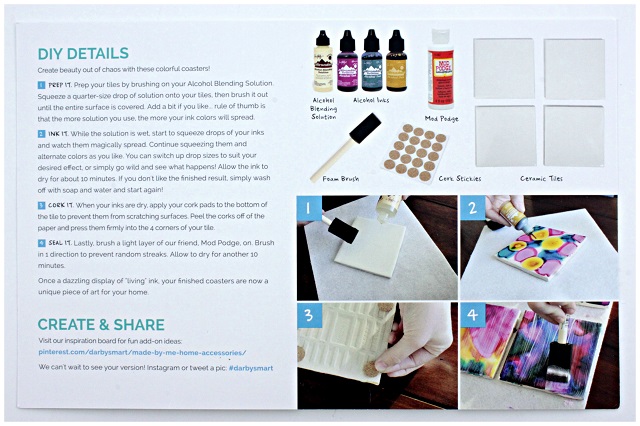 |
| Darby Smart To DIY For February 2014 Project – instructions |
 |
| First coaster is ready, but the pattern looks streaky. I added a few more ink drops to even it out. |
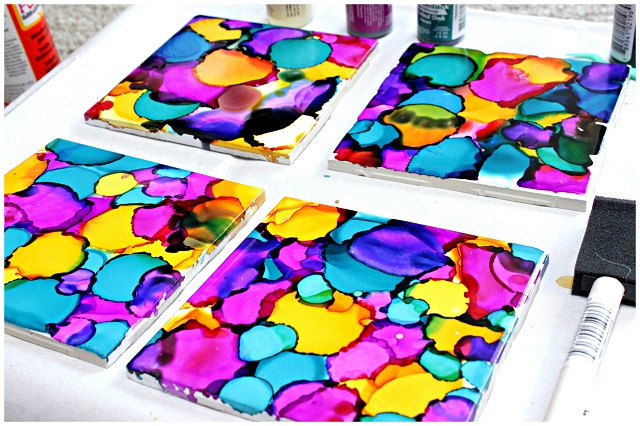 |
| Finished painting all four coasters. |
 |
| Alcohol inks dry nice and glossy. |
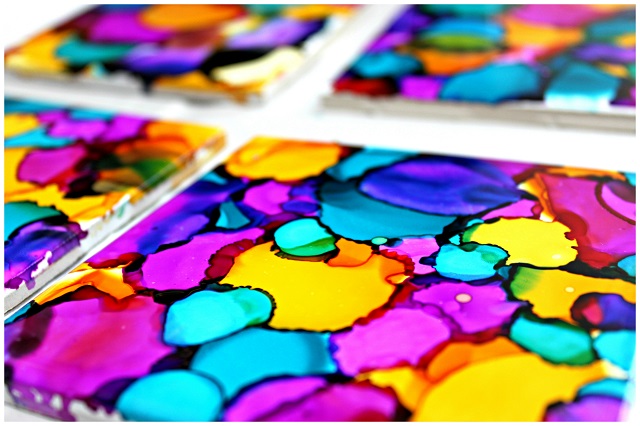 |
| Love the colors! |
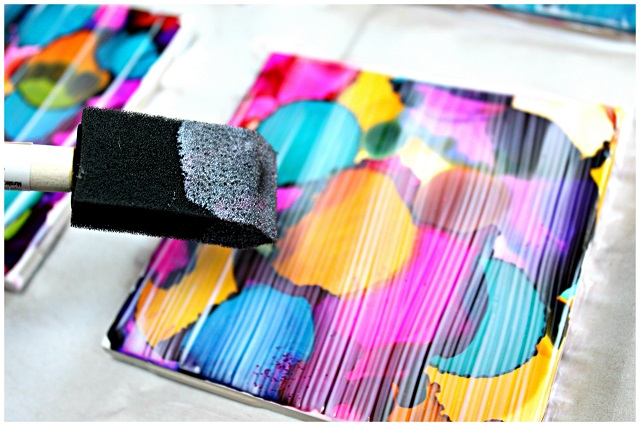 |
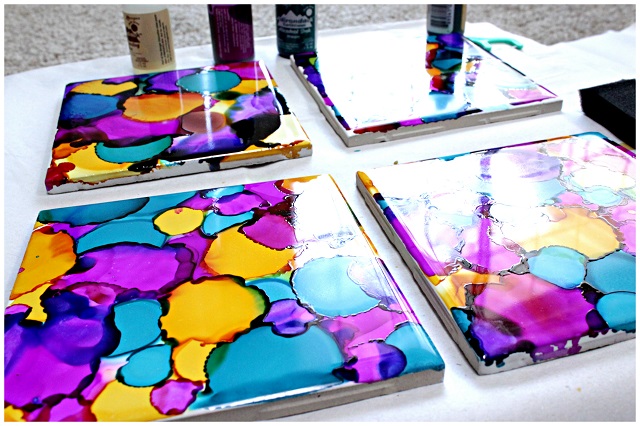
| Final touch – a nice thick coat of mod podge. It looks white when applied but dries to a clear finish. |
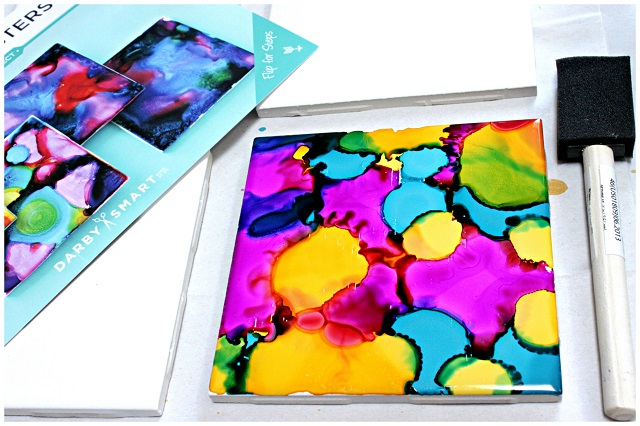
The package came with all of the supplies needed for the project: four plain white ceramic tiles, alcohol blending solution, three different colors of alcohol inks, a foam brush, cork stickers and a small bottle of Mod Podge.
Following the directions, I applied alcohol blending solution to the tiles first, spread it with foam brush, and started dripping the inks on top, alternating the colors, to create unique shapes and patterns. After I was done with that first step, I had to let the tiles stand for 10 minutes until dry, then simply sealed everything with Mod Podge, using the clean side of foam brush. I applied several coats, so my coasters had to dry overnight, but one layer would probably be enough. Overall, this was a very fun little project that even kids could do easily!
THE VERDICT
I had lots of fun with this project, and these coasters turned out very pretty and practical. I like the variety of DIY kits offered at Darby Smart website, there’s something for everyone: how about a wood burning kit for Dad as a Father’s Day gift, jewelry-making kit for your teens and tweens, or a personalized Baggu grocery tote kit for yourself? Between those and also DIY home decor, hostess gift kits, and even candle-making projects to choose from, Darby Smart curators never seem to run out of cool ideas!
Connect with Darby Smart on Facebook, Twitter and Pinterest and use hashtag #darbysmart to share your DIY projects.
Disclosure: This post contains products sent for editorial consideration. This post contains affiliate or referral links. For more details about our product review policy and information about affiliate links, please refer to Disclosures & Content Use page. To find out more about our product rating check out Product Rating page.
Copyright: The content in this post is protected by copyright. To view our copyright policy, please refer to Disclosures & Content Use page.

Love love love this idea!!! One of my new years resolutions was to do more DIY which hasn’t quite happened yet but this would be a great way to start!!
Absolutely! I find their projects very inspiring, after I was done with this one I immediately had more ideas about my future crafts.
Cute!! I’ve made coasters with ceramic tile and scrapbook paper before, and it’s fun 🙂
ooh that sounds like a great idea, I might try that next time 🙂
I really love this!
Glad you like my little craft 🙂
There was a KLOUT perk for this some time ago, I waited to long and didn’t get it. Now I am regretting that!
Right, I remember that perk, Klout hates me, so i never got it 🙁
What a fun project. These would make great gifts or a good girls night activity!
That sounds like a great idea for a fun group activity.
Wow you did a really beautiful job! I wish I was crafty!
Thank you Justina! This is really easier than it looks 🙂
I’m not very crafty as a rule, but I think even I would try these coasters. I think they’re gorgeous! I think this would be a great gift for the craft lovers in our lives!
Me neither, actually, and I found this tutorial very simple. You can definitely do it!
I love the colors and how that turned out!
I’m glad that you enjoyed it 🙂
They are gorgeous and perfect for my soon to be apartment
Nice! Your apartment is probably all bright and colorful, just like you are <3
so bright and pretty! 🙂 great post! i have been wanting to try this company! so many fun crafts
They have wonderful CS and fast shipping, you should give them a shot 🙂
You delight me with all your sub boxes, I couldn’t keep up anymore, haha! I love DIYs. I like how this project came out!
Haha, I’m totally addicted to those. I don’t know what I’d do with myself if I had to get rid of all my monthly subscriptions!
These coasters are beautiful. Great job! I’ve never heard of this sub box but I’m really interested. I’d like to do things like this but am too lazy to go get all the supplies. lol Thanks!
Glad you liked my outcome! This is def a lazy-DIY subscription, because just like you I hate getting supplies, but love trying to make things 🙂
I loveeeeee the bright colours. I’m so awful at DIY but surely I could even do this one?!?
I’m sure you could, because I’m really not crafty at all, and I could follow the instructions with ease. I like that they provided all the supplies as well.
I’ve had my eye on these kits, love your coasters!
Thank you, Tina, I’m also pleased with the way they turned out 🙂 These bright colors cheer me up in the morning, right now all i can see outside is snow 🙁 Brrrr, Michigan!
Those coasters are absolutely gorgeous! I love the bright and cheerful colors!! I haven’t tried Darby Smart yet, but I have seen some great diy projects!
Thank you, Amber, I’m glad you like those coasters!
Now that is pretty cool. I think my son would love that kind of monthly subscription box.
They actually have a subscription for tweens, you could check it out. I’m not sure what kind of projects they include there though.
I love those vibrant colors!!!!
Glad you like them, Kimberly 🙂
LOVE what you created! I’m not a DIY-er but every time I see beautiful creations like this I think about becoming one.
Girl, neither am I, I swear! This is just so easy and fun, and makes me look all crafty haha 🙂
How FUN!
It really is! Darby Smart has lots of great projects to choose from, on top of their monthly DIY box 🙂